Followers

Sunday, May 11, 2014

Pillow Talk!!!!

Hello folks.  We have another challenge at One Stitch At A Time so how about popping over to see all the fabulous creations by the design team.

Challenge #212

Theme 'Use A Digi' 

The sponsor is StitchyBear Digital Outlet with a 7 image prize pack. To win main prize you MUST use an Image from our store. Runner up prize for person using none store image is $3 to spend in the StitchyBear Digital Outlet. So everyone can win something ;O).

My mini team are using the digi 'Pillow Talk' by Stitchy Stamps this week.  To begin with I used some black and white paper from Papermania for the wall paper of my scene and some red velvet fabric for the carpet.  The skirting board (base board) is some think black ribbon.


 Next I drew the bed for the scene and printed it on some patterned paper.  I have no idea what has happened to the paper, it really is patterned and looks a bit like leather.  I then coloured the areas of the bed frame I wanted darker.  After that I fussy cut from another print out, the duvet, sheet and pillow. Sorry forgot to take a pic at this point.
Onto colouring the digi using Promarkers, once coloured I fussy cut her out as I want to attacher her with a wiggle :)
 Promarkers used
 For the tag - I printed the sentiment and then mounted on black card.  The bow is made from organza and then I threaded beads to the string with a wee pearl pearls and heart sequin at the bottom.
 With all the bits ready, time to assemble
 Here we have the finished card with the digi in all of a fizzle (I wonder why!!!!!!)
And here she is, much more relaxed :) :) :)


Ingredients:-
  • 'Pillow Talk' by Stitchy StampsI am entering this card into the following challenges:-
  • DP - Papermania
  • Wiggle
  • Promarkers
  • Ribbon, material, paper scraps and beads from my stash
I am entering the following challenges
Thanks for looking and hope you have a happy crafting day:)

Friday, May 9, 2014

La Fée Verte - but mine is blue!!!!

A day for total self indulgence :)  I love Aurora Wings digs, bought a bunch a couple of years ago when I first started using digi images to make cards, as just could not resist :)  Think we have all been there - got to have hahahaha

As this is such a detailed image I really want a card which is all about the image so clean shapes, a little lace and a few flowers.  Not that this was a quick card to make, at least 5 hours just colouring :)

OK, so I started by colouring the digi in just blues for the Aurora Wings Monochromatic challenge.  Promarkers were used for the fairy, her wings and her dress section including how the folds become a spray of flowers.  For the rest of the image I used anything I could find in my stash that was a similar colour; Derwant and Lakeland pencils, metallic pen and my old and not many left working gel pens, with the win of trying to achieve contrast but not introduce to many hues.
 These the the mixed media items I used.
To finish off I used Ice Stickles on the wings and many of the bubble/droplets in the digi.  
Once coloured and embellished, a simple navy mount to match the card base and white peel off line stickers for a border.
I do love flowers on cards so following the  rose theme of the image I air brushed 3 roses, added in a couple of  carnation looking flowers and lilies with pearls.  Finally a couple of skeleton leaves.  I did away with the roses as when I put them on the card they were just to yellow/cream and instead added more lillies.
 For a bit more dimension I used navy wire and made these tendrils.
 To complete the inside of the card I used a Sizzix border emboss and cut die.  I then used Spellbinders Grand Nestabilities Grand Labels 1 for the basic shape.  To finish off a bit of lace, Liquid Pearls and Ice Stickles to match the front of the card.

View showing inside of card.
 Front view.

Ingredients
  • Digi - La Fée Verte by Mitzi Sato-Wiuff
  • Promarkes, Derwent and Lakeland pencils
  • Dies - Sizzix border die and Spellbinders Grand Nestabilities Grand Labels 1
  • Ice Stickles and Liquid Pearls
  • Flowers, gems, skeleton leaves and lace from my stash
I am entering this creation into the following challenges:-

Portrait of Morrigane

I am feeling very privileged to be asked to showcase this beautiful digi 'Portrait of Morrigane' by Nikki Burnette for the Barnemix site, a Norwegian crafting blog run by Anne-Lise.   I do love the American Indian theme so was absolutely delighted when I saw what I was going to be working with this digi :)

For this creation I decided to make a notes holder and here is what I did:
I started by printing my work sheets where I had prepared my background in Photoshop along with the tag sections and of course a the digi.
I used a rubber stamp from StampScapes Nature Sentiments which I then embossed with embossing powder.
Next I used one of my 6x4 never used embossing folders which now have a new lease of life with my rolling pin hammering method hahahaha.  Seriously though it is a great way of using the folders that don't fit the area you want embossed and also controlling the areas for embossing.
I embossed both the top and the bottom sections of the note holder, here you can see how I worked around the areas which were not part of the digi.
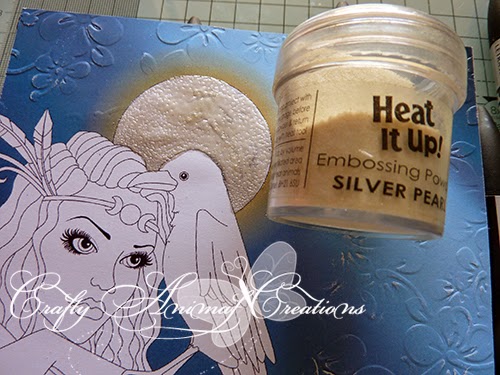
I coloured the moon with grey Promarkers then used Silver Pearl heat embossing over the top.  In different lights the moon takes on different shades and has a lovely shimmer to it.
Promarkers used
Time to colour an IKEA pencil - thank you IKEA, your pencils are just perfect for my wee note cards :)  I also coloured a silver butterfly metal charm.
My latest craze at the moment is using lots of beads on either charms for pencils as seen here or to hang tags.  I was given loads of beads ages ago and could never think what to use them for and this does seem to be a great way.  I have also used light blue sequins in this charm thread for a bit of twinkle.
Time to finish off the tag.  My poor sister at this point will have to look away <g>  I used black and grey feather to follow the colours of the crow/raven and a black/red feather to pick out the red of Morrigane's dress and feathers.  Finally I added a black tassel with pearls.
I have missed out a few photos of what I did, just realised I did not take one of the coloured digi which I fussy cut and then attached to the card or of the box I made and coloured with Promarkers to hold the note paper.

Ingredients
  •  'Portrait of Morrigane' by Nikki Burnette
  • Promarkers
  • Embossing Powder - Personal Impressions Enchanted Blue Pearl and Heat It Up Silver Pearl
  • Embossing folder
  • Feathers, tassel, pencil, charm, beads from my stash
Challenges entered

Tuesday, May 6, 2014

Things With Wings - Robot 1

Time for another challenge over at

Things With Wings

Morning folks, hope you are having a good day today :)   It is week two of the IKEsWORLD challenge, Things With Wings and still plenty of time for you to enter.  Just remember, you must use and IKEsART image to be eligible for the prize.  Why not pop on over to the store, Ike produces the most amazing stamps, everything from off the wall to cute and fluffy :) :) :)

Don't we just love it when we see a challenge 'Things With Wings', I know I do :)  OOOooooo butterflies, fairies, angels, birds even flying fish hahahahaha.

I wasn't in a fairy or butterfly mood when I had to choose the digi to work with for this challenge, I really don't know what I was thinking when I chose Robot 1  but I am really glad I did .  So is there any thought behind this card or did I just whack it together purely aesthetically? There is a thought :) - it really bugs me how superficial I feel the world is, too much attention to top layer beauty when really beauty comes from within.  Robot 1 was perfect for me going down this road (although she is still beautiful on the top layer <g>).  We always see angels as white, pure, but is your best friend not also an angel, and you best friend might even be you pet.  So out of the box, how about an angel cyborg - not perfect on the top layer but underneath the exterior all the beauty in the world lives.

First I created wings to go with the digi as she didn't have any and needed them to fit in with the challenge theme.  I used silver metallic card and cut with my die cutter.  I also made a halo at the same time.  I was after a rusty metal sort of effect to follow in the robotic theme so I sprayed the die cuts with Promarker Warm Grey 4-5.  This was amazing, by holding the airbrush really close to the paper which did not have an absorbent surface I was able to to get blistering and damaged areas.  A unexpected, good outcome error lol.

Next I coloured the digi with Promarkers.  Once coloured I then used Bronze Stickles for all the rivets.
I printed out the saying topper and the base topper which I had created.  Working on the bottom topper I used washers which I had also sprayed with Promarkers and some wire which I swisted a few few times.  Next the washers were threaded onto the wire and attached to the topper with glue dots.
Time to put the robot angel sections together.  I layered the wing and stuck together with double sided tape.  Next I stuck the digi on black card and fussy cut.  The wings were then placed behind the digi and foam tape used to adhere to the card.  The wings are showing all the colours but this is from the way the light is reflecting on the mirror card I colour do.  I only used Warm Grey 1-5 to colour, no green, pink yellow or cyan lol.
Time now to put the card together, here you are and hope you like it. I gently bent the text topper and washer topper and rubbed their edges, trying to give a distressed look then attached with double sided tape.  The Robot 1 (angel) and halo were attached with foam tape.

Ingredients:-
  • Digi -  Robot 1 
  • DP - Industriana pack by Kaban
  • Promarkers
  • Bronze Stickles
  • Washers and wire from my stash
I am entering this project into the following challenges:-

Monday, May 5, 2014

SPS - Woodland Fairy by Charity Dauenhauer

Sweet Pea Stamps

Today is my day to showcase an image from Sweet Pea Stamps and I have opted to use the digi Woodland Fairy by Charity Dauenhauer.
.
I fancied making my own background for this card, partially because I could not find just the right paper in my stash and also because I have loads of rubber stamps which I don't use much, I am totally useless at rubber stamping lol.  To begin with I designed the coloured background in Photoshop and used a leaf brush for the borders.
 Next I stamped a bunch of trees using the Scenescape trees set and then I embossed them with black embossing powder.
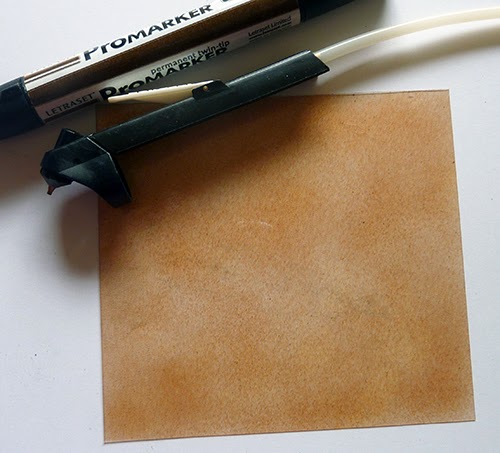
 To break the background up a bit but not hide it I airbrushed a piece of acetate with a brown Promarker.
 Next I coloured the digi with Promarkers and also use in some Derwent Artist pencils for the background.
 I have to admit, I was not happy with the background done with the pencils so reverted to my usual method of masking the digi and then airbrushing with Promarkers.
 To finish off the digi I add Stickles to the flowers and butterflies (forgot to show the colour I used, sorry) and also to the leaves.  In the bottom right I assed Flower Soft to give a lovely textured and very 3D feel.
 To complet the card I added turquoise lace and flower embellishment made up of plant matter.  Three button to the bottom of the branches and a wee bow with a turquoise gem I found in my button box, think it was a bit of an earring in a past life.  The final touch was some more Flower Soft.

Ingredients
  • Digi - Woodland Fairy by Charity Dauenhauer.
  • Promarkers
  • Rubber stamps for the background - Trees from Stampscapes
  • DP by me
  • Stickles, lace, embossing powder, buttons, plant matter, gems, Flower Soft etc from my stash.
Challenges entered

Sunday, May 4, 2014

Lily Fairy Notebook

Hello folks.  We have another challenge at One Stitch At A Time so how about popping over to see all the fabulous creations by the design team.

Challenge #211

Theme 'Ribbon or Lace' 

The sponsor is StitchyBear Digital Outlet with a prize of $9 to spend in the st. To win main prize you MUST use an Image from our store. Runner up prize for person using none store image is $3 to spend in the StitchyBear Digital Outlet. So everyone can win something ;O).

For this weeks DT card I have used the digi Lily Fairy by Digi Blessings.  I totally adored colouring this digi in, great fun.  Next I cut using Spellbinders Grand Circles.
 I attached Embroidery Anglais which was already ruffled around the back.
Onto the card blank which I embossed with an Embossalicious folder for the top half and then went over the top with a green stamp pad.  For the bottom section I added lace then went over it to with the green ink pad.
 Promarkers used
 Onto the bow now which was made out of organza and then I attached a wee white flower, the same as used on the box I made to hold the notepad.  I have just realised I did not take any photos of the box - sorry.
 Next to find some white flowers, I used roses, carnations and lilies and a strand of pearl.  Here you can see the items I have ready.
 Time to assemble.


Ingredients:-
  • Digi -  Lily Fairy by Digi Blessings
  • Die - Spellbinder Grand Circle
  • Embossing Folder - Embossalicious
  • Promarkers
  • Lace, pearls and flowers from my stash
I am entering this card into the following challenges:-
Thanks for looking and hope you have a happy crafting day:)